
Birthday Rainbow Sugar Cookies

These Birthday Rainbow Sugar Cookies are as fun to make as they are to eat. Crisp yet tender, beautifully decorated with vibrant royal icing, and completely gender neutral for any birthday party or celebration. Whether you place them on the dessert table or wrap them as gifts, they will steal the show every single time.
This post may contain affiliate links. If you purchase through these links, I may earn a small commission at no extra cost to you. Thank you for supporting Love & Harvest!

This post covers recipes for both the cookies and the royal icing.
These bright rainbow sugar cookies will bring joy to any birthday party. Red, yellow, orange, and blue are the primary colours used here — completely gender neutral for any girl or boy’s birthday. They are fun to make and delicious to eat. Whether you place them as a centrepiece on the dessert table or as a gift in a clear bag, people will love them.
Why You Will Love These Rainbow Sugar Cookies
- No plastic gifts: These beautiful cookies are great as gifts. If you are a plastic-conscious parent and want to cut plastic usage at your party, these sugar cookies are a perfect alternative.
- Tastes amazing: Crunchy on the edge, soft in the centre. We use real butter and vanilla extract to get bold, delicious flavour.
- Easy to decorate: We have great tips on how to decorate them like a pro, even if it is your first time.
- Beautiful: These cookies are gorgeous and the bright colours make them very celebration-worthy.

Why Make Them?
I want to say that we are losing our creative selves to the convenience of buying things. Giving people handmade desserts is a habit we should not lose. These cookies are great gifts that showcase your creativity, craft, and thoughtfulness.
And the recipe I am sharing is the best-tasting sugar cookie I have been making for over 10 years. The flavour is on point, the texture holds design beautifully, and they store well too.
Ingredients
Key Ingredients
Unsalted Butter
Cold, cubed unsalted butter is the foundation of this sugar cookie recipe. It creates a tender crumb and gives every bite a rich, buttery flavour.
- Why it matters: Using cold butter (not softened) gives the dough more structure and prevents the cookies from spreading too much while baking. This is what allows you to cut clean, sharp-edged shapes that hold their form through decorating.
A KitchenAid Stand Mixer makes creaming the butter much easier, though a hand mixer works perfectly fine too.
Vanilla Extract
Real vanilla extract is what separates a good sugar cookie from a great one. Use your Homemade Vanilla Extract if you have it — the depth of flavour makes a noticeable difference.
- Why it matters: Vanilla adds warmth, depth, and a subtle floral aroma that makes these cookies taste bakery-quality. For royal icing, use a clear vanilla extract to keep the icing bright white.
Food Colouring Gel
We use Gel Food Colouring for the royal icing. Gel colouring is highly concentrated, so a small drop goes a very long way and produces vivid, true colours without affecting the icing consistency.
- Why it matters: Liquid food colouring adds water to your icing, which throws off the consistency. Gel colouring gives you intense, beautiful colour without changing the texture.
Piping Bags
Having the right piping bags makes all the difference for clean, controlled decoration.
- Why they matter: Piping bags give you precise control when outlining and flooding the cookies. In a pinch, you can use resealable freezer bags with the corner snipped off.
How I Organize My Days
I start preparing my dough 2 days before the event. If the party is on Sunday: Friday night I make the dough and chill it overnight. Saturday afternoon I bake the cookies. Saturday night, when the house is quiet and the kids are asleep, I decorate. By Sunday, I am just packaging them.
Decorating Sugar Cookies Is Therapeutic
Decorating sugar cookies is my mental therapy. If you like adult colouring books, sewing, or beading, you will love this. Decorating sugar cookies activates the same relaxation response as meditation — it quiets the restless mind and generates a state of mindful focus and peace.
I decorate my cookies when the kids are asleep and the house is quiet. I burn a nice candle, make a cup of tea, and off I go into my creative meditation state. It is deeply restful.

Royal Icing vs. Flood Icing: What Is the Difference?
Royal icing is the outline. It is thick and concentrated, so wherever you pipe it on the cookie, it stays exactly there.
Flood icing is thinned royal icing. It is more liquid and will spread across the cookie surface. You always apply the royal icing outline first to trap the flood icing inside the perimeter. The benefit of flood icing is that it covers large areas quickly and produces a smooth, professional finish.

Professional Tips
Pro Tip 1 — Bake Until Slightly Brown at the Edges
Once the cookies show a slight brown rim, they are done. Do not let the entire surface go brown — the cookies will be too hard. Since they sit out for a long time while decorating, we do not want to over-bake them.
Pro Tip 2 — Flip the Cookies Upside Down Out of the Oven
Flip the cookies as soon as they come out of the oven while they are still warm and adjustable. Flipping them upside down guarantees a flatter top surface, which is critical for clean, even icing. A domed surface causes the icing to slide and run.
Pro Tip 3 — Always Chill the Dough as a Flat Disk
When the cookie dough is cold, it holds sharp edges during cutting and baking. Chilling a round ball is less effective — always flatten the dough into a disk before refrigerating. This also makes rolling out the dough much easier with fewer cracked edges.
Pro Tip 4 — Cut the Piping Bag Tip Small
Start with a smaller opening and work your way up if needed. Thinner tips give you more control over details and fine lines. You can always cut more off, but you cannot put it back.
Pro Tip 5 — Mix and Colour Icing in Separate Bowls
Once you know which colours you need, divide the icing into separate small bowls. Colour each bowl individually and mix with a spatula until the colour is consistent and smooth.
Pro Tip 6 — Decorate Only When Completely Cooled
This is the most important tip. Only start decorating once the cookie is completely cool. If you apply icing to a semi-warm cookie, the icing will melt and spread uncontrollably. Patience here is everything.
Frequently Asked Questions
How far in advance can I bake sugar cookies?
You can bake the undecorated cookies up to 3 days in advance and store them in an airtight container at room temperature. The dough also freezes well for up to 3 months — roll it out, cut the shapes, and freeze the unbaked cutouts on a sheet pan.
Why is my royal icing too thick or too thin?
Thick icing: add water one drop at a time and stir. Thin icing: add sifted powdered sugar a teaspoon at a time. The “15-second test” is your guide — drag a knife through the icing and count. If it smooths over in 15 seconds, the consistency is right for flooding.
Can I use regular food colouring instead of gel?
You can, but the colours will be less vibrant and the added liquid may thin your icing. Gel colouring is strongly recommended for the best results without affecting texture.
How long does royal icing take to dry?
The surface will be dry to the touch within 1-2 hours. For fully hardened icing that you can stack and package, allow 6-8 hours or overnight. Never stack cookies until the icing is completely hardened.
Can I freeze decorated sugar cookies?
Yes. Freeze decorated cookies in a single layer until the icing is solid, then transfer to an airtight container with parchment between layers. They freeze well for up to 1 month. Thaw at room temperature for 1-2 hours before serving.
What is the best way to give these as gifts?
Place each cookie in a clear cellophane bag, tie with a ribbon that matches the party colours, and add a small tag with the flavour. For a birthday gift set, stack 3-4 cookies in a box lined with tissue paper. They look absolutely stunning and make a very personal, memorable gift.

Decorate Sugar Cookies
An all-purpose sugar cookie recipe for cookie designers! Great in both flavour and texture, perfect for any celebration or special occasion.
Print Recipe
Pin Recipe
Course: Cookie
Cuisine: American
Keyword: creative food, design, sugar cookie
Equipment
- stand mixer
- large bowl
- spatula
- small spoons
- freezer quality ziplock bags
- elastic bands
Ingredients
Sugar Cookies
- 1 cup unsalted butter (2 sticks) cubed cold
- 1 cup granulated sugar
- 2 eggs
- 1 tsp vanilla extract
- 3 cups all purpose flour you might need 4 cups
- 1 tsp baking powder
- 2 tsp salt
Royal Icing
- 4 cups powdered sugar
- 4 tbsp meringue powder
- 4 tbsp water warm
- 2 tsp vanilla extract clear colour extract
- 1 tsp almond extract clear colour extract
Instructions
Sugar Cookies
- In a large bowl, cream together butter and sugar until smooth. Beat in eggs and vanilla. Stir in the flour, baking powder, and salt.
- Flatten the dough into a 2-inch disk. Do not chill the dough in a ball. Cover, and chill dough for at least one hour (or overnight).
- Preheat oven to 400°F (200°C).
- Roll out dough on a floured surface to 1/4 to 1/2 inch thick. Cut into shapes with any cookie cutter. Place cookies 1 inch apart on ungreased cookie sheets.
- Bake 6 to 8 minutes in the preheated oven, or until the rims of the cookie show a slight brown colour. Flip upside down immediately and cool completely.
Royal Icing
- In a large bowl, add the powdered sugar and meringue powder and mix together. Using an electric mixer on low speed, add the extracts and water (1 tablespoon at a time) and mix until smooth.
- If you are planning to colour the icing, this is the stage to mix that in. If making multiple colours, divide the icing into smaller bowls and place a damp paper towel over the bowls you do not plan to use first.
- The goal with royal icing is that it is thick enough that it will not run off the side of the cookie, but thin enough to meld together smoothly. Use the “15 second icing” test: drag a knife through the icing and it should smooth back over within 15 seconds.
- Keep any icing that is not being used covered with plastic wrap as it dries out quickly. Transfer to piping bags and decorate cookies.
Flood Icing
- Take the desired colour of royal icing in a bowl. Add a few drops of water to the bowl and mix vigorously until smooth. Transfer to a piping bag and carefully flood the cookies along the perimeter outlined with the royal icing.
Notes
- If your icing has started to harden, add a drop or two of water to bring it back to your desired consistency.
- When using royal icing to decorate cookies, pipe the outline first, then flood it. Outlining keeps the icing from sliding off the cookies.
- Add a few drops of water and stir with a spatula for a flooding consistency. Continue adding water until you achieve the desired consistency.
Love cookie decorating? Try our Homemade Halloween Sugar Cookies using this same recipe dressed up for Halloween. Or use your freshly made Homemade Vanilla Extract to take the flavour to the next level.
Birthday Rainbow Sugar Cookies
Ingredients
- 1 cup unsalted butter (2 sticks, cold and cubed)
- 1 cup granulated sugar
- 2 eggs
- 1 tsp vanilla extract
- 3 cups all-purpose flour (up to 4 cups may be needed)
- 1 tsp baking powder
- 2 tsp salt
- 4 cups powdered sugar
- 4 tbsp meringue powder
- 4 tbsp warm water
- 2 tsp vanilla extract (clear colour extract)
- 1 tsp almond extract (clear colour extract)
Instructions
- 1In a large bowl, cream together the cold cubed butter and granulated sugar until smooth. Beat in the eggs and vanilla extract. Stir in the flour, baking powder, and salt until a dough forms.
- 2Flatten the dough into a 2-inch disk — do NOT chill in a ball. Cover and refrigerate for at least 1 hour or overnight.
- 3Preheat oven to 400°F (200°C).
- 4Roll out the chilled dough on a floured surface to 1/4 to 1/2 inch thick. Cut into shapes with cookie cutters and place 1 inch apart on ungreased baking sheets.
- 5Bake 6 to 8 minutes, until the edges show a slight brown colour. Flip the cookies upside down immediately while still warm, then cool completely before decorating.
- 6In a large bowl, combine the powdered sugar and meringue powder. Using an electric mixer on low speed, add the extracts and warm water (1 tablespoon at a time) and mix until smooth.
- 7To colour the icing, divide it into small bowls and mix in gel food colouring. Keep bowls covered with a damp paper towel to prevent drying.
- 8Test consistency: drag a knife through the icing — it should smooth back over within 15 seconds. If too thick, add water one drop at a time. If too thin, add sifted powdered sugar a teaspoon at a time.
- 9Transfer icing to piping bags and decorate cooled cookies. Apply a thick outline first, then flood the interior with thinned flood icing.
- 10Take the desired royal icing colour and add a few drops of water. Mix vigorously until smooth and more fluid. Transfer to a piping bag and flood the inside of the outline you piped on the cookie.
Nutrition per serving
Recipe by Love & Harvest
Shop What You'll Need

Cuisinart Ice Cream Maker
Behind our strawberry and chocolate fudge ice creams.

Ceramic Pie Pans (Set of 2)
Our go-to for spiced pumpkin pie and cherry clafoutis.
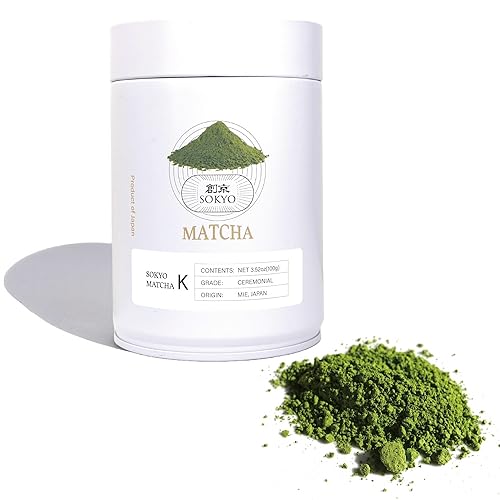
Ceremonial Matcha Powder
The star of our matcha avocado popsicles.
* As an Amazon Associate I earn from qualifying purchases.
Nutritional information is estimated and may not be accurate. It is for informational purposes only. Consult a registered dietitian for personalised dietary advice.
Allergen notice: Recipes may contain common allergens including gluten, dairy, eggs, nuts, soy, sesame, or shellfish. Always verify ingredient labels if you have food allergies.

Recipe by
Samantha Chow
Recipe Developer
Canadian designer cooking her way through Mexico. Three kids, one kitchen, a world of flavours. Read Sam's full story →
Free Download
Get 7 Quick 30-Minute Family Dinners — Free
Sam's most-requested weeknight dinners, on the table in 30 minutes. For families who want to eat well even on crazy nights.
By subscribing you agree to our Privacy Policy. Unsubscribe anytime.
Try These Next
 bread recipes
Mexican Corn Cake with Cream Cheese
If you’ve ever tasted Pastel de Elote, you know it’s more than just a cake—it’s a story baked into every slice. Sweet, moist, and rich with the flavor of fresh corn, this 8-ingredient Mexican Corn Cake with Cream Cheese is one of those recipes that will transport you straight to a Mexican kitchen. Whether you []
Get the Recipe →
 dessert recipes
Cherry Clafoutis Pie
A dessert recipe the whole family will love.
Get the Recipe →
 air fryer recipes
Dairy-free Chocolate Cake
An air fryer recipe the whole family will love.
Get the Recipe →